For the last 18 years, developers are working on various Ruby on Rails projects, from simple calculating apps to complex web apps. Beginner developers work on simple projects like building a calculator, and conversion of strings and characters using RoR and gradually move towards complex web apps.
Some companies power their websites using RoR like GitHub, Airbnb, Dribble etc. To get there, a beginner must practice coding and build simple apps to get hold of the art.
This blog discusses four simple Ruby on Rails project that you can complete in three hours like an exam. You will be learning how to build a blog to publish content, a shopping cart, a quiz game and a Twitter bot. You will be able to learn basic operations like creating a project, working with the databases, defining models and setting up controllers for the app to work properly.
Let’s begin!
Related Post: 13 Essential Ruby On Rails Interview Questions for 2023
1. The first classic exercise is to build a blog using RoR
To build a blog using Ruby on Rails, you will need to do the following:
Install Ruby and Rails
Make sure you have Ruby and Rails installed on your system. You can check if you already have Ruby installed by running the command ruby -v in your terminal. If you don’t have Ruby installed, you can install it using a package manager like rbenv or rvm. To install Rails, run the command gem install rails.
Create a new Rails project:
Run the command rails new “myblog” to create a new Rails project called “myblog”. This will create a new directory called “myblog” and generate the necessary files and directories for a Rails app.
Set up the database:
Rails uses a database to store data, such as blog posts and comments. By default, Rails uses the SQLite database, which is fine for a small blog. If you want to use a different database, you can specify it in the Gemfile and run the appropriate commands to set it up.
Define the models:
In a Rails app, a model is a class that represents a table in the database. For a blog, you will need at least two models: one for the posts and one for the comments. To create a model, run the command rails generate model Post title:string body:text to create a model called “Post” with a title and body field. Repeat this process to create a model for comments.
Set up the controllers and views:
In a Rails app, the controller is responsible for handling requests from the user and rendering the appropriate view. To create a controller for your blog, run the command rails generate controller Posts. This will create a new controller called “Posts” and generate the necessary files and directories for the views.
Create the routes:
In a Rails app, the routes define the URL patterns that map to the appropriate controller actions. To create a route for your blog, open the file config/routes.rb and add a line like resources :posts. This will create routes for the basic CRUD (create, read, update, delete) actions for the posts.
Add some seed data:
To add some initial data to your blog, you can use the Rails seeds.rb file. Open the file db/seeds.rb and add some code to create some posts and comments using the models you defined earlier. Then run the command rails db:seed to add the seed data to the database.
Test the app:
Run the command rails server to start the Rails development server, and visit http://localhost:3000 in your web browser to see your blog. You should be able to see the posts and comments you added in the seed data.
That’s a basic overview of how to build a blog using Ruby on Rails. There are many more details and features you can add to your blog, such as user authentication, tagging, and pagination. I recommend checking out the Ruby on Rails documentation and tutorials for more information.
Related Post: The Best Ruby Frameworks for Web Development and Business Growth in 2023
2. Build a simple product catalogue and shopping cart using RoR
To build a simple product catalog and shopping cart using Ruby on Rails, you will need to do the following:
Install Ruby and Rails:
Make sure you have Ruby and Rails installed on your system. You can check if you already have Ruby installed by running the command ruby -v in your terminal. If you don’t have Ruby installed, you can install it using a package manager like rbenv or rvm. To install Rails, run the command gem install rails.
Create a new Rails project:
Run the command rails new mystore to create a new Rails project called “mystore”. This will create a new directory called “mystore” and generate the necessary files and directories for a Rails app.
Set up the database:
Rails uses a database to store data, such as products and orders. By default, Rails uses the SQLite database, which is fine for a small store. If you want to use a different database, you can specify it in the Gemfile and run the appropriate commands to set it up.
Define the models:
In a Rails app, a model is a class that represents a table in the database. For a store, you will need at least two models: one for the products and one for the orders. To create a model, run the command rails generate model Product name:string price:decimal:precision:8:scale:2 description:text to create a model called “Product” with a name, price, and description field. Repeat this process to create a model for orders.
Set up the controllers and views:
In a Rails app, the controller is responsible for handling requests from the user and rendering the appropriate view. To create a controller for your store, run the command rails generate controller Products. This will create a new controller called “Products” and generate the necessary files and directories for the views.
Create the routes:
In a Rails app, the routes define the URL patterns that map to the appropriate controller actions. To create routes for your store, open the file config/routes.rb and add lines like resources :products and resources :orders. This will create routes for the basic CRUD (create, read, update, delete) actions for the products and orders.
Add some seed data:
To add some initial data to your store, you can use the Rails seeds.rb file. Open the file db/seeds.rb and add some code to create some products using the model you defined earlier. Then run the command rails db:seed to add the seed data to the database.
Implement the shopping cart:
To implement the shopping cart, you can use a session to store the current cart. In the ApplicationController, you can add a before_action callback to set the @cart variable for every request. You can then add methods to the ProductsController to add and remove items from the cart.
Test the app:
Run the command rails server to start the Rails development server, and visit http://localhost:3000 in your web browser to see your store. You should be able to see the products you added in the seed data and add them to the cart.
That’s a basic overview of how to build a simple product catalog and shopping cart using Ruby on Rails. There are many more details and features you can add to your store, such as user authentication, payment processing, and order history.
Related Post: How To Assess A Junior Ruby on Rails Developer
3. Creating an object-oriented quiz game using RoR
To create an object-oriented quiz game using Ruby, you will need to do the following:
Define the quiz game class:
Start by creating a class for the quiz game. This class should have a constructor method that initializes the quiz game with a list of questions and answers. You can also add methods to the class to start the quiz, display a question, and check the answer.
Define the question class:
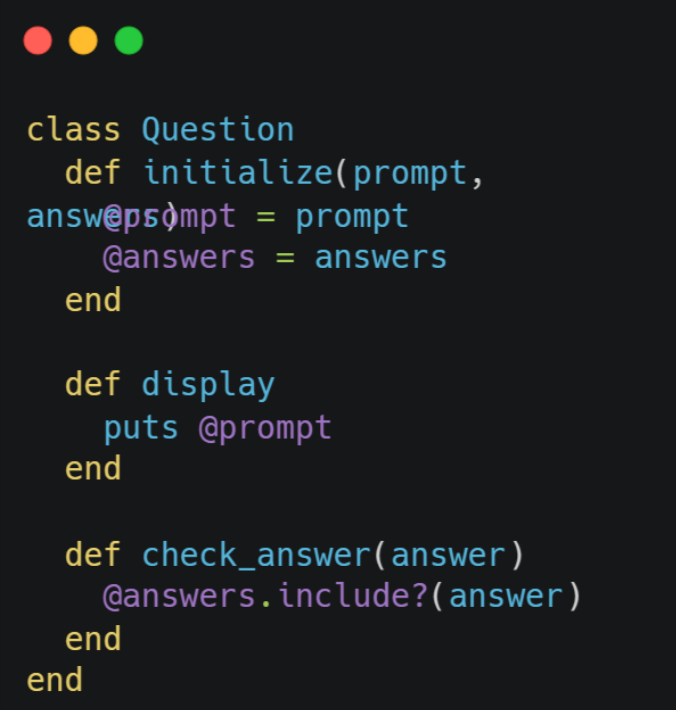
Next, create a class for the questions. This class should have a constructor method that initializes the question with a prompt and a list of possible answers. You can also add a method to the class to display the question and another method to check the answer.
Create the quiz game:
To create an instance of the quiz game, you will need to create an array of question objects and pass it to the quiz game constructor. You can then call the start method on the quiz game to start the quiz.
Display the questions:
To display the questions, you can use a loop to iterate over the list of questions and call the display method on each question. You can also use the gets method to get the user’s answer and pass it to the check_answer method to check if it is correct.
Keep track of the score:
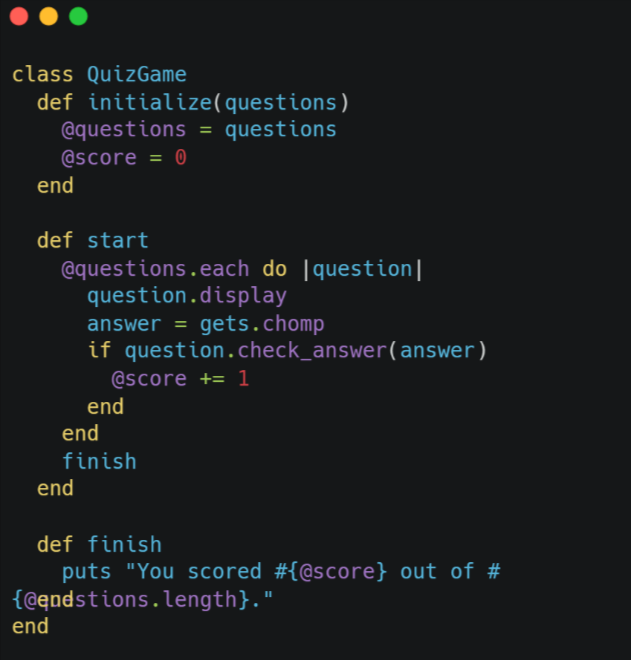
To keep track of the score, you can add a score variable to the quiz game class and increment it whenever the user answers a question correctly. You can also add a finish method to the quiz game class to display the final score.
Here is an example of what the quiz game class might look like:
Related post: How to Fine-Tune your Rails application with Rails Service Objects
And here is an example of what the question class might look like:
To create an instance of the quiz game and start it, you can do something like this:
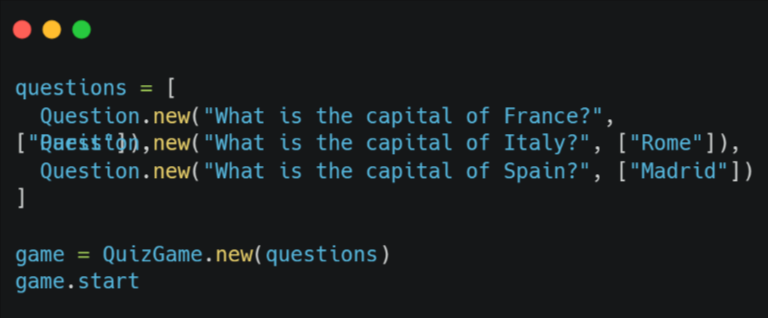
That’s a basic overview of how to create an object-oriented quiz game using Ruby. You can add more features and complexity to the game by adding more methods and variables to the classes and by using more advanced features of the Ruby language. Ruby on Rails microservices can help to improve scalability, maintainability, and flexibility and promotes faster deployment.
4. Creating a Twitter or Reddit bot using RoR
Sure! Here is an example of how you can build a Twitter bot using Ruby on Rails:
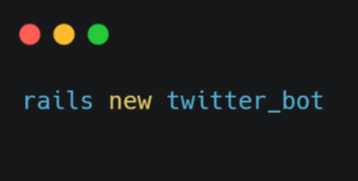
First, you will need to set up a new Rails application. You can do this by running the following command in your terminal:
Next, you will need to create a Twitter account for your bot and obtain API keys and access tokens. To do this, visit the Twitter Developer website and create a new developer account. Once you have created your account, you can create a new app and obtain the necessary API keys and access tokens.
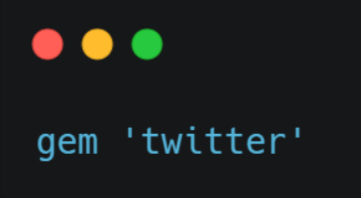
In your Rails application, you will need to install the twitter gem. This gem provides an easy-to-use interface for interacting with the Twitter API. To install the gem, add the following line to your Gemfile:
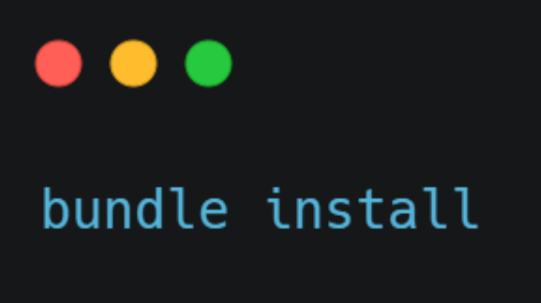
Then run the following command to install the gem:
Now you can use the twitter gem to interact with the Twitter API. For example, you can use the client object to send a tweet like this:
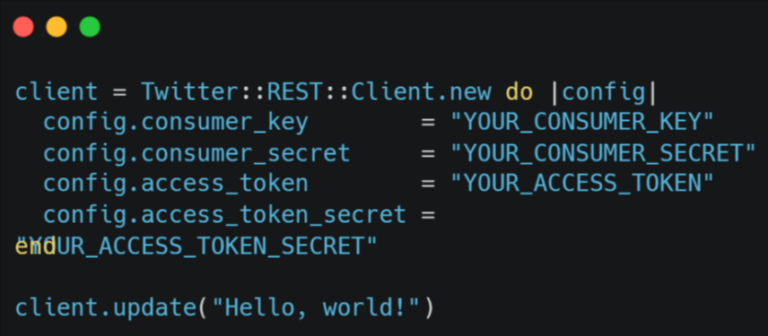
To set up your bot to tweet automatically at regular intervals, you can use the whenever gem to set up a cron job. First, add the whenever gem to your Gemfile:

Then run the following command to set up the initial configuration for ‘whenever’:
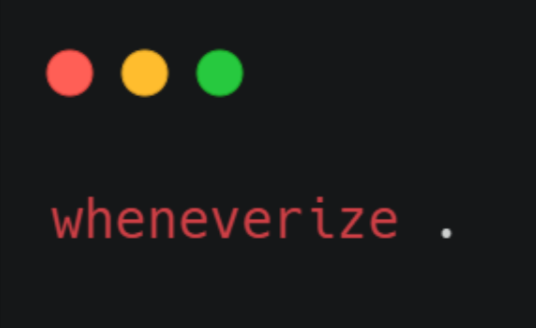
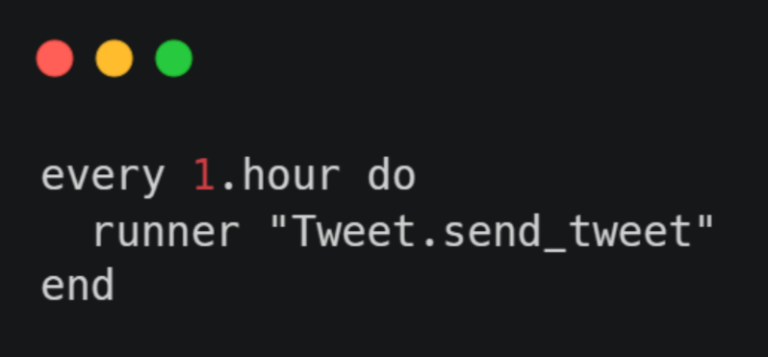
This will create a config/schedule.rb file where you can define your cron jobs. For example, to tweet every hour, you can add the following line to the file:
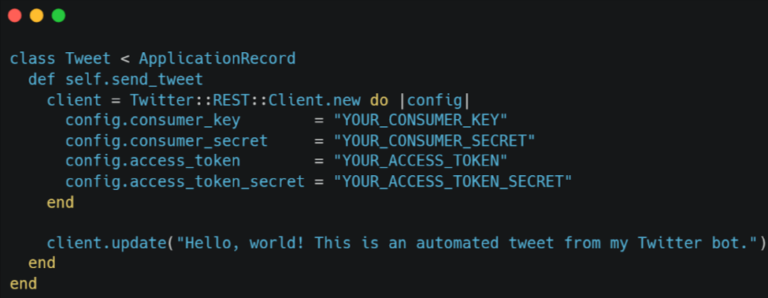
Finally, you can create a Tweet model with a send_tweet method that will be called every hour to send a tweet. In the send_tweet method, you can use the client object to send a tweet. For example:
That’s it! Your Twitter bot should now be tweeting automatically every hour. Also, you can customize the behaviour of the bot as per your needs.
Conclusion
In this blog, we have created four projects. These projects will give you insights on how to get used to building Ruby on Rails projects.
There are some simple steps in creating a simple project with Ruby on Rails. These steps include installing Ruby on Rails and creating a proper development environment. After that the internal processes include defining classes and definitions, setting up databases and feeding them information and extracting that information to present them to users.


